|
|
Electronic Data Submittal Application (EDSA) User's Manual
EDSA version 7.1.5 May 2013
Introduction
Prior to submitting electronic data to SRP, the LSRP or the data preparer on behalf of the responsible party, should run the data through the Electronic Data Submittal Application version 7 (EDSA7) to determine if the data meet the administrative and format requirements described in the SRP-Electronic Data Interchange Manual (SRP-EDI). This check ensures that the data are in the correct format. The use of EDSA7 is not required by law, however EDSA7 is extremely beneficial to the data preparer because it reduces data submittal failures and increases data quality. SRP strongly recommends the use of EDSA7 for all data submittals. The computer running EDSA7 must have Windows XP or higher. EDSA7 must be installed on the computer that is being used to run the data.
How to install EDSA7
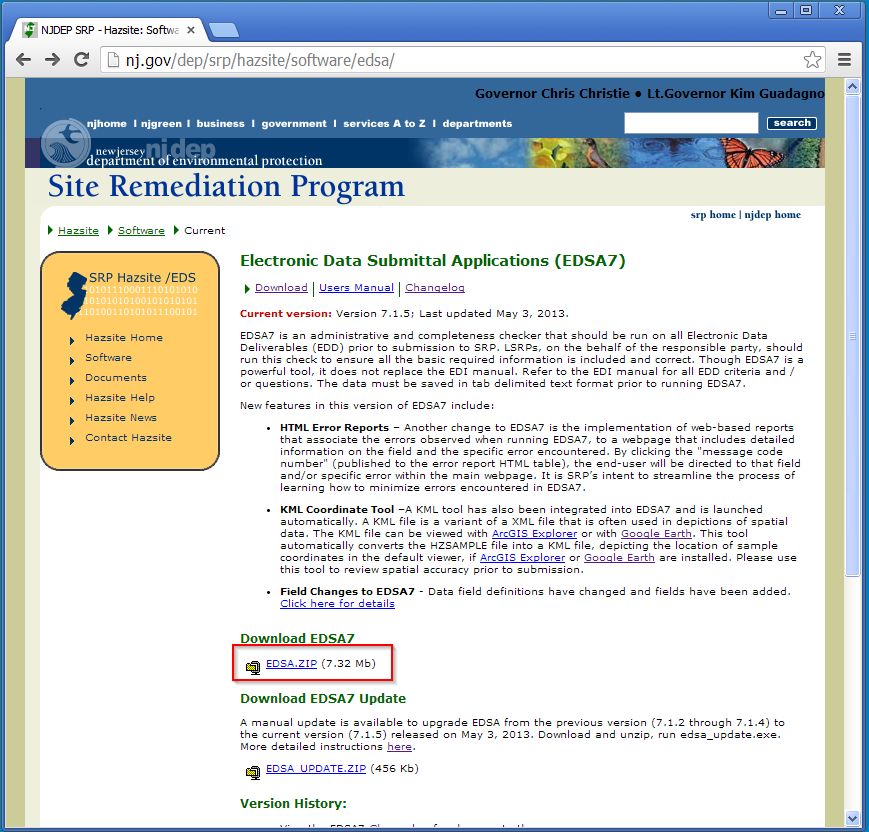
- On the web page at https://www.nj.gov/dep/srp/hazsite/software/edsa/ click the link labeled EDSA.zip under the heading Download EDSA7. You can also download EDSA 7 directly by clicking here.
- Save the file to your computer.
- Navigate to where you saved your file.
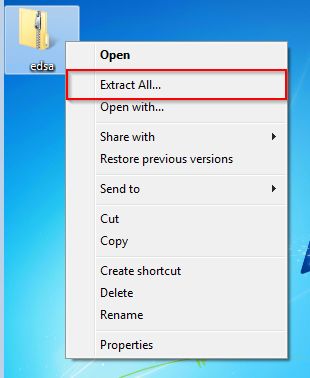
- Unzip the files. Windows XP and above has a built in zip utility. To activate the zip utility: right click on the EDSA.zip file window to display a menu of possible actions, then click Extract All....
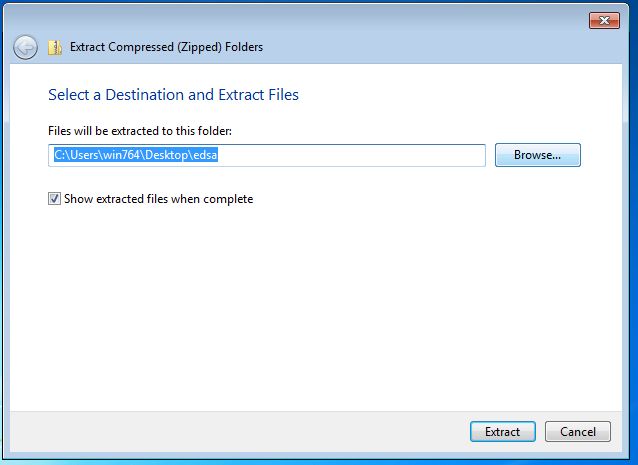
- The Extract All wizard will prompt you to choose where to extract the files, and an option to show the files when extraction is complete. Selecting the "Show extracted files" option will automatically open an Explorer window that shows the extracted files and help with the next step.
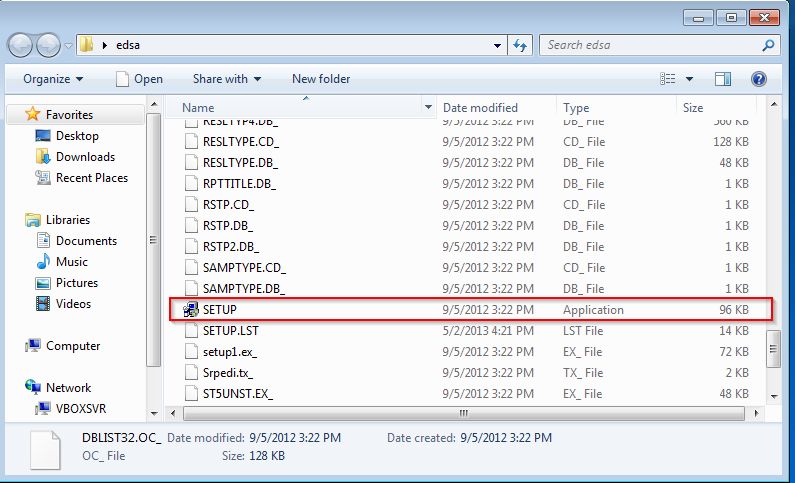
- In the extracted folder, scroll down to the Application file named SETUP (or SETUP.EXE, depending on your Windows Explorer setting) and double click it to start the installation process.
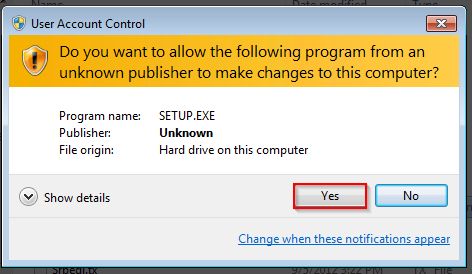
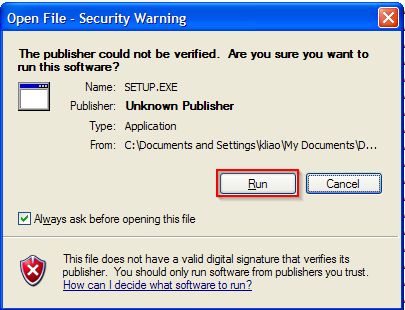
- Depending on the version of Windows and the security permissions, you might get a message box to warn you that you are opening a program that could do harm to your computer, and asks if you want to continue. Click Yes or Run depending on your version of Windows
 |
 |
| Windows Vista/7 |
Windows XP |
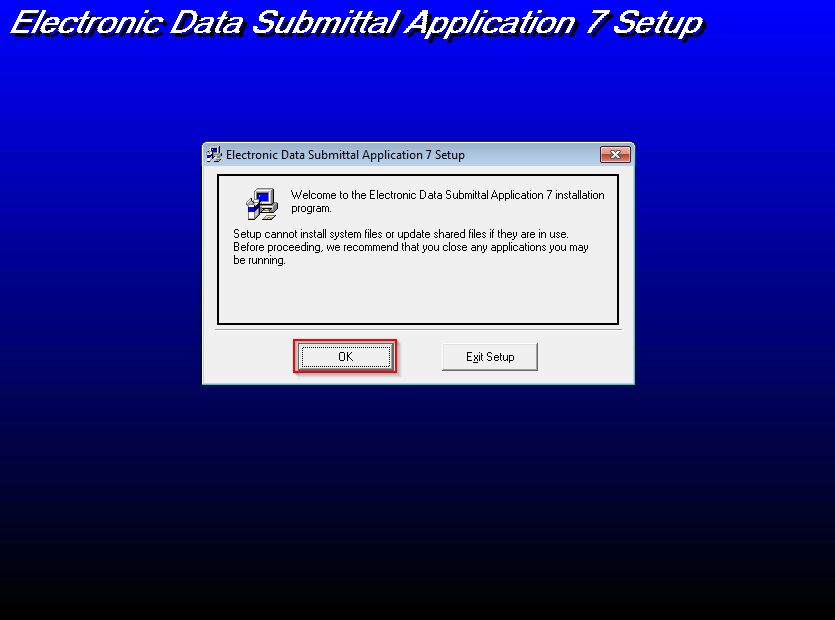
- It cautions you to close unnecessary application windows. Although SRP EDD help desk does not know of any current day applications affected by this SETUP, you might want close as many windows as possible. Click "OK" on the message box that warns you to close down unnecessary application windows.
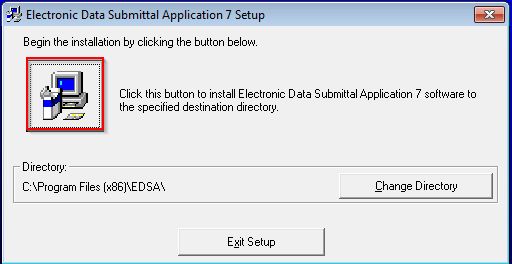
- The next message box shows which folder in Program Files or in Program Files (x86) will contain EDSA files. Continue the installation process by clicking in the large, square button in the upper-left-corner that depicts a desktop computer and a software box.
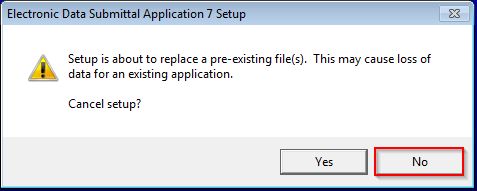
- If a version of EDSA was previously installed on the machine, SETUP may display two message boxes asking for permission to overwrite previous EDSA installation files that have the same names as the new ones.
- 1st message box
Setup is about to replace a pre-existing file(s). This may cause loss of data for an existing application.
Cancel setup?
(Click 'No')
- 2nd message box
Installing over an existing installation without first removing it may damage that installation or cause future attempts to remove the installation to fail.
Are you sure you want to continue?
(Click 'Yes')

- When SETUP is finished, it will advise you to restart your computer. Restarting is only necessary if this is the first time you are installing EDSA or if your PC has been re-imaged since EDSA or EDSA7 was last installed.
- Click on Start > Programs > Electronic Data Submittal
- Starting EDSA7 from the icon brings up the main screen:
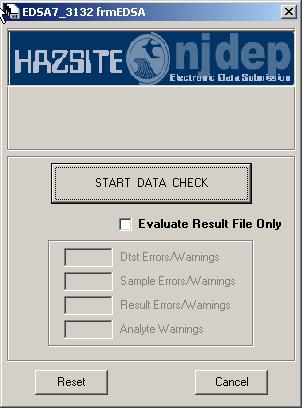
The main screen includes buttons to activate the data checking process (START DATA CHECK), Reset, Utilities and Cancel.
Note: Labratories have an option to only check the HZRESULT file by selecting the "Evaluate Result File Only" checkbox before hitting the "START DATA CHECK" button.
- Click the "START DATA CHECK" button
The START DATA CHECK button opens a standard Windows navigation window. The window allows the user to pick the location where the files being checked are stored. EDSA7 will automatically store these files in C:\TEMPEDSA temporarily, if another location is not selected. EDSA7 will delete the files stored in C:\TEMPEDSA when the data preparer clicks the Reset button or re-starts the program. SRP strongly recommends that you save the files in a separate location for future use, if necessary.
Note: Included among these stored files are correctly-formatted Excel files. Your DTST, HZSAMPLE and HZRESULT data will be loaded into these files as it is received. Error tables for each of the files (ERDTST.DBF, ERSAMP2.DBF and ERRESUL2.DBF) are also stored in C:\TEMPEDSA. These files are used by the Error Report Reader to create an HTML error report with links to a webpage that explains the errors encountered
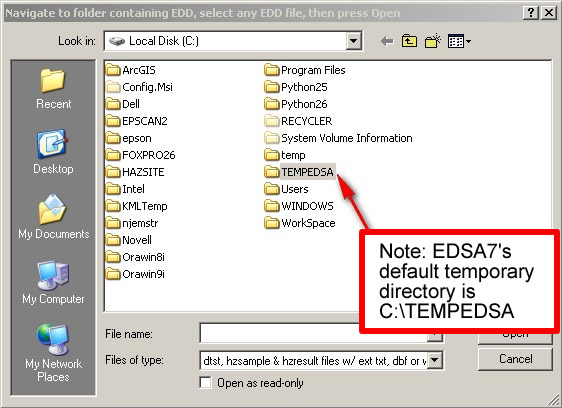
- Select the disk drive and filewhere your data is located and click on the DTST file.
- If there are any errors, EDSA7 will identify the errors and automatically display them via the Error Report Reader. A Message Code and a brief explanation of what the error is will also be displayed. Click on the Message Code for additional information and possible fixes. Warning messages are triggered by possible errors that EDSA7 could not verify as an error. Warning messages and the associated data should be reviewed carefully and rectified if needed.
- In addition, if the spatial software Google Earth or Arc Explorer is installed on your computer, EDSA7 will automatically launch the software. The KML Coordinate Tool used to display spatial data, will help the data preparer validate coordinate locations. The KML tool uses the coordinates in your HZSAMPLE.TXT file, as it is submitted, to automatically zoom to that location. All sampling location numbers included in HZSAMPLE.TXT are also automatically displayed by the KML tool. Once you are at the location, you can use aerial views and street views to verify all the sampling locations.
KML files are automatically saved in C:\tempEDSA_KML as SRPID_yyyymmdd_YYYYMMDD.KML where the first date is the earliest SampDate value and the second date is the latest SampDate value.
Tutorials and Help menus on loading and using the spatial software are available via the web site of the spatial software that you chose. NJDEP GIS is currently working on additional KML tools, for Arc Explorer, which will be available soon.
The Reset button clears all data stored in C:\TEMPEDSA to prepare fora new dataset
|